Every dog owner knows that their furry friend is more than just a pet; they are family. Our dogs bring immeasurable joy, loyalty, and love into our lives, and they deserve the very best. As a pet parent, you want to ensure your furry companion is both safe and stylish, and what better way to achieve that than by crafting a personalized dog name tag? In this comprehensive guide, I will take you on a creative journey, teaching you how to design and craft unique dog name tags from acrylic or wood. With a few essential tools and a dash of creativity, you can make tags that not only ensure your pet’s safety but also reflect their individuality. So, let’s embark on this exciting crafting adventure and create a dog name tag that truly stands out, celebrating the cherished place your dog holds in your heart.
Materials You Will Need:
1. Laptop or Computer with Design Software
2. Acrylic or Wood Sheets
3. Laser Cutter
4. Keychain Ring Clips
Step 1: Find Inspiration and Sketch Your Ideas
The first and crucial step in crafting a dog name tag is to immerse yourself in a world of inspiration. It is essential to remember that your dog’s tag should not only be a representation of their personality but also an extension of your own unique style. Start by exploring various designs, shapes, and styles that resonate with you. Conduct thorough research by browsing online, visiting pet stores, or examining existing dog tags for fresh ideas.
A pivotal aspect of your creative process is considering your dog’s character and preferences. Take a moment to reflect on what makes your furry friend unique. Do they have a cherished toy or a beloved activity that defines their essence? Whether your dog is a water-loving retriever, an elegant poodle, or a playful terrier, these defining characteristics should serve as the initial building blocks for your design. Use these characteristics as a starting point for your design because it is details like these that will elevate your dog’s name tag from a mere accessory to a piece of art.
Once you have envisioned your design, it is time to bring those ideas to life by sketching them out. Whether you envision a classic bone shape, a playful paw print, or a nod to your dog’s favorite pastime, these sketches will serve as the foundation for your unique dog tag. In addition to the visual elements, this is also the moment to contemplate the text you want engraved on the tag, as it plays a pivotal role in both functionality and aesthetics. So, let your imagination run wild as you embark on the exciting journey of designing a tag that truly captures the spirit of your beloved pet.
Step 2: Refine Your Designs Using Design Software
Once you have your sketches in hand, the next step is to bring your creative vision to life on your computer. Design software, such as Adobe Illustrator or Canva, will be your best friend in this creative process. Begin by importing your sketches into the software and embark on the process of digital refinement. Ensure that your designs are not only visually appealing but also smooth, legible, well-spaced, and appropriately sized.
One of the key aspects to consider when refining your designs is selecting the perfect font. Opt for an easy-to-read font that not only complements the overall design but also ensures that the text on the tag is clear and legible. The text is, after all, a functional component of the tag and should be easily comprehensible. In addition to font selection, this is the stage where you can incorporate graphics onto the tag. Experiment with different layouts, colors, and styles to create a harmonious and visually pleasing design.
As you dive deeper into the design process, remember that this tag is a reflection of your pet’s unique personality and your own creativity. So, don’t be afraid to push the boundaries of your imagination. Embrace the opportunity to infuse elements that make your dog special, be it through a favorite color or a design that reflects their favorite activities. The tag is not just an accessory but a canvas for self-expression and an homage to your beloved furry companion.
Step 3: Prepare Your Designs for Printing
Before moving forward, it is essential to double-check that everything is in the right place on your design software. Pay special attention to the positioning of text and graphics. If you are creating a double-sided tag, make sure the two sides are the same size for each print. Outline all your text to ensure proper spacing and legibility. Remember that the end result should be both aesthetically pleasing and functional.
Step 4: Transfer Your Designs to Retina Software
Your designs are now ready for the next step. Import them into Retina, the software that controls the laser cutter. This is where you’ll adjust your designs to the desired printing size and select your choice of material – acrylic or wood.
Step 5: Prepare the Laser Cutter
Before making any adjustments to your designs in Retina, ensure that the laser cutter environment is ready. Turn on the air compressor and ventilation system to provide a safe and efficient workspace. These components are essential for maintaining a safe and breathable environment while operating the laser cutter. The air compressor supplies a continuous flow of air, which keeps the machine cool and ensures proper ventilation. Safety is most important in this process, so check that your workspace is well-ventilated and equipped with safety gear like goggles.
Step 6: Adjust Your Designs in Retina
With your workspace now secure and well-ventilated, it’s time to revisit your designs in the Retina software. Within Retina, you will resize your designs to match your preferences. You will also need to input the thickness of the material you are using – this information helps the laser cutter determine the appropriate settings for cutting and engraving. Different materials may require different settings, so take your time to adjust these factors for the best results.
Step 7: Laser Cutter Setup
With your design and material selection in order, it is time to set up the laser cutter itself. This step involves several important actions:
– Lower the bed of the laser cutter to create a level surface for your work.
– Carefully insert your chosen material, whether it’s acrylic or wood. Ensure it lies flat and secure within the machine.
– Position the material in the center of the laser cutter bed. Precise placement is crucial to ensure the design will be accurately etched.
– Once the material is centered, use the auto-focus feature on the laser cutter to guarantee the laser head is at the correct height for cutting and engraving.
– To further ensure accuracy, run a perimeter check to verify that everything is correctly positioned.
This setup process ensures that your design will be etched precisely as intended and results in a professional-looking dog name tag.
Step 8: Begin the Printing Process
With the laser cutter bed correctly prepared and your designs securely in place, you are now ready to begin the printing process. Click the “Ready” button in the Retina software and watch as the laser cutter begins to work its magic. Remember, it is crucial not to leave the machine unattended during this time. While the laser cutter does its job, you can observe the process as it accurately brings your designs to life on the material of your choice. This step is not only about crafting; it is about witnessing your creativity become tangible, resulting in a unique dog name tag that your pet will wear.
Step 9: Retrieve Your Finished Product
Once the laser cutter has completed its work, the final step is to retrieve your finished product. Carefully lower the bed and gently slide your beautifully crafted material out of the machine. You will be amazed at how precise and intricate the laser-cut designs are, a testament to the magic of modern technology and your creative vision.
Step 10: Attach Keychain Ring Clips
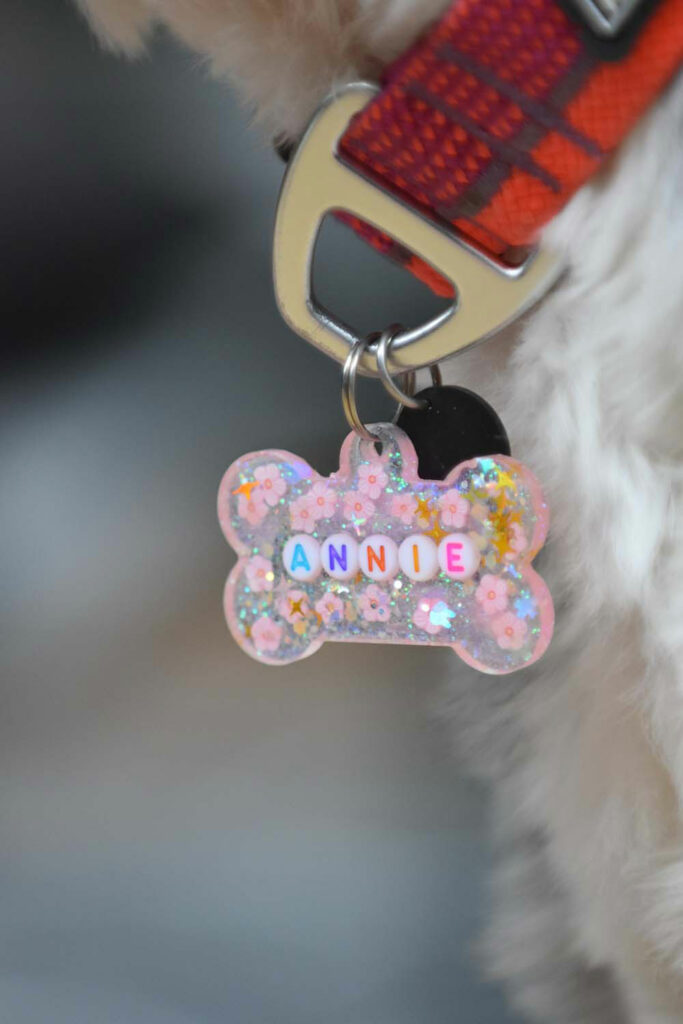
To finish your dog’s name tag, attach a keychain ring clip to the small hole you have designed into the tag. This simple addition allows you to easily connect the tag to your dog’s collar, ensuring that they are both safe and stylish wherever they go.
Conclusion
By following these steps, you have successfully created a unique and personalized dog name tag that not only adds style to your pet’s collar but also ensures their safety. The process of designing and crafting your dog name tag allows you to infuse your pet’s identity into every detail. Your furry friend will proudly show off a tag that is as special as they are, and you will enjoy the satisfaction of a DIY project well done.
Your dog’s name tag will not only serve as identification but also as a reflection of your love and creativity. It is an accessory that showcases the bond between you and your canine companion. So go ahead, become creative, and make a dog name tag that truly represents your furry friend.
Crafting a dog name tag is a delightful DIY project, combining your affection for your pet with your artistic talent. It is a personalized touch that sets your pet apart and lets them wear their identity with pride. So, gather your materials, unleash your creativity, and embark on this crafting adventure to create a dog name tag that will leave tails wagging and hearts full of joy. Happy crafting!
Dating is a truly joyful experience. Sometimes we lose sight of this truth in our search for the right Online dating site
Thanks for sharing. I read many of your blog posts, cool, your blog is very good.
Thanks for sharing. I read many of your blog posts, cool, your blog is very good.
Thank you for your sharing. I am worried that I lack creative ideas. It is your article that makes me full of hope. Thank you. But, I have a question, can you help me?
Can you be more specific about the content of your article? After reading it, I still have some doubts. Hope you can help me.
I don’t think the title of your article matches the content lol. Just kidding, mainly because I had some doubts after reading the article.
Can you be more specific about the content of your article? After reading it, I still have some doubts. Hope you can help me.
Your article helped me a lot, is there any more related content? Thanks!
Thanks for sharing. I read many of your blog posts, cool, your blog is very good.
I don’t think the title of your article matches the content lol. Just kidding, mainly because I had some doubts after reading the article.
I don’t think the title of your article matches the content lol. Just kidding, mainly because I had some doubts after reading the article.
Thank you for your sharing. I am worried that I lack creative ideas. It is your article that makes me full of hope. Thank you. But, I have a question, can you help me?
Thanks for sharing. I read many of your blog posts, cool, your blog is very good.
I don’t think the title of your article matches the content lol. Just kidding, mainly because I had some doubts after reading the article.
Thanks for sharing. I read many of your blog posts, cool, your blog is very good.
Dijital pazarlama Google SEO sayesinde müşteri tabanımızı genişlettik. https://www.royalelektrik.com/caddebostan-elektrikci/
Telif hakkı ihlali SEO hizmetleri ile Google sıralamalarında ciddi bir artış sağladık. https://www.royalelektrik.com/basinkoy-elektrikci/
Başlık etiketleri SEO hizmetleri ile web sitemizin performansı gözle görülür şekilde arttı. https://www.royalelektrik.com/hasanpasa-elektrikci/
DMCA atan piç SEO optimizasyonu sayesinde daha fazla müşteri web sitemizi buluyor. https://www.royalelektrik.com/elmalikent-elektrikci/
beşiktaş elektrikçi SEO optimizasyonu ile arama motorlarında daha fazla görünürlük elde ettik. http://royalelektrik.com/
bakırköy elektrikçi Google SEO, dijital pazarlama stratejimizde devrim yarattı. https://www.royalelektrik.com/
eyüp elektrikçi SEO optimizasyonu, web sitemizin trafiğini büyük ölçüde artırdı. http://www.royalelektrik.com/
Gaskan terus buat kau ya ANJINGLAH
Vidio 18+ Jepang Bokep
Vidio Bocil 18+ Bokep
Link paling hoky saat ini hanya ada di https://chartersolutions.org/
Situs penyedia video orang bocil saat ini bokep jepang
beşiktaş elektrikçi Google SEO, dijital pazarlama stratejimizin temel taşı oldu. http://www.royalelektrik.com/
Скачайте приложение с https://888starz.today и начните выигрывать прямо с телефона.
Скачайте мобильное приложение от 888Starz и начните выигрывать прямо с телефона https://php.ru/forum/members/makksimnoviikwv.140427/